In this case study, we will demonstrate how to render a report in a Perspective which is similar to the Report Designer using Action. We can continue using the Perspective created in Case Study 1.
-
Since we are rendering a report, we will need a report template. Create a new report template
and give it a unique name. In this case study, we name it Fruit Report.
Click
Next. For the datasource, we will use FruitSales.ds (available in /ElixirSamples/DataSource). ClickNext. As for the report type, we will use a Standard Report, Tabular Report. ClickNext. For simplicity, we will use all the fields in FruitSales.ds. To move the fields to the Report column all at one go, you can click on the second button from the top. Click onFinishto exit from the wizard. - On exiting of the wizard, the report template would have been created. To add this report template to the perspective, go to the perspective and simply drag the file to the perspective. In this case study, we will add it to the right of FruitSales.
-
At the second page of the
Edit Contentwizard, click on the empty field underMapping, then click on the...button. In theDataSet Chooserwizard, click on theViewtab. Select FruitSales, thenSelected. Exit theDataSet Chooserwizard by clicking onOk. Exit theEdit Contentwizard by clicking onFinish. -
To add an action to generate the report template, go to the
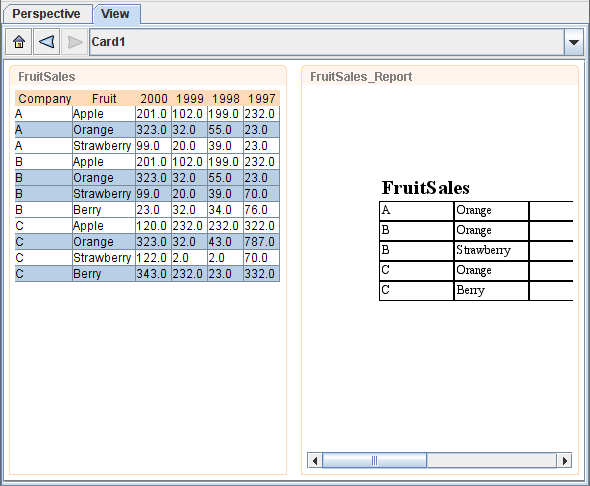
Perspectivetab. At theActiontab, click on theAddicon and the Action Wizard will appear. For theViewandContent, select Fruit Report. For theEvent, select doubleClick. For theType, select Render Report. For theView, select Fruit Report. Exit the wizard by clicking on theOkbutton. With this, the report template will display records selected from FruitSales, and you can render the report by double-clicking. - Now, try selecting some records from FruitSales. The report template will show the selected records, which is something like Figure 4.3, “Sample”.
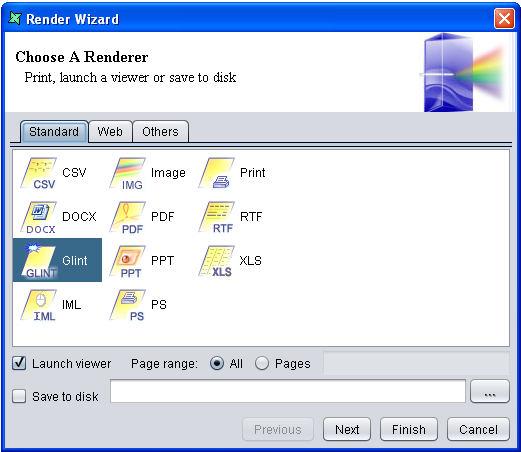
- To render the report, double-click within the area of the report template (as configured in the Action wizard). The Render Wizard which is similar to the one in Report Designer will appear, as shown in Figure 4.4, “Render Wizard”. Select the format you wish to render the report to and run through the wizard if you need to do any extra configurations.
-
The report will be generated to your desired format after clicking on
Finish.