Table of Contents
The common elements in the Elixir Workspace are discussed in the Elixir Repertoire user manual, which shows how to add filesystems and files. This chapter will discuss the Elixir Report Designer features that build on the workspace.
Each FileSystem has a pop up menu. On selecting the Add -> Report Template, the "Report Wizard" appears as shown in Figure 2.1, “Add Report”. Enter the name and description of the Report Template in the text box and click the Next button. Alternatively, by clicking the New File button [icon] on top of the Elixir Repository panel you can select Report Template from the Add File dialog. This is followed by selecting the location for the Report Template, then click on the Finish button.

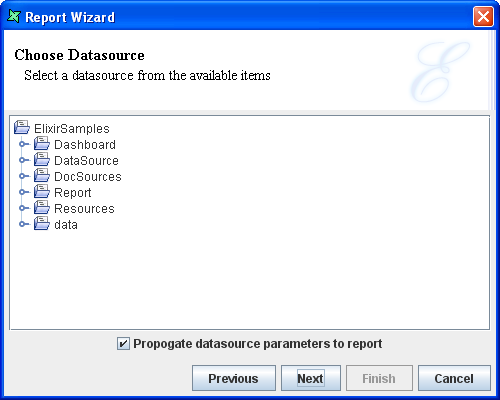
Choose a DataSource from the repository as shown in Figure 2.2, “Choose DataSource”. If the selected data source contains parameters that need to be propagated to the report then select "Propagate datasource parameters to report" check box. Otherwise you should provide values for any dynamic parameters here. For more information on the parameters and their propagation refer to Chapter 3, Report Structure and Invocation.
On the next screen, select the Report Type from the list of report types as shown in Figure 2.3, “Choose Report Type”.
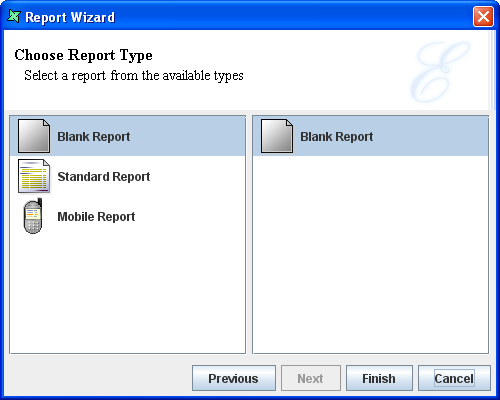
There are wizard pages to guide you in creating three types of reports: Blank, Standard and Mobile.
On selecting the Blank Report and clicking the Finish button a blank report is added to the window. All report components must be added manually.
The three types of Standard Reports are Tabular, Columnar Report and Mailing Labels as shown in Figure 2.4, “Standard Reports”.
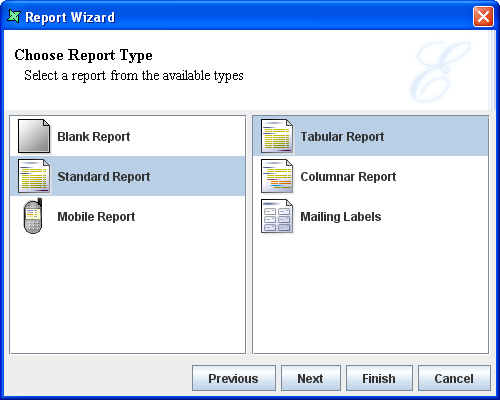
Tabular Report
If you want to add a report in the form of table then select the Tabular Report from the standard report types that are listed. Click the Next button.
The fields in the data source are listed so that you can choose the ones you want to add to the report. Here's an example of a tabular report generated with four columns:Figure 2.5, “Generated Tabular Report”.
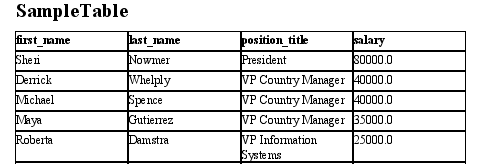
You can now improve the report by adding colours, logos and additional information to meet your requirements.
Columnar Report
A Columnar Report allows elements to be grouped. The creation steps are similar to the creation of a Tabular Report, except in addition you need to specify the fields to be grouped, and optionally any sorting. You are provided with some choices for the report layout:
Stepped: Stepped layout is the default and the most commonly required layout for the majority of reports. In stepped layout the grouped fields are arranged in indented steps and the rest of the fields are arranged in sequence.
Block: A block report displays data that has been grouped or sorted in vertical columns.
Align Left: In this type of layout all the data are aligned to the left of the table. The grouped columns are displayed one below the other and the sorted columns are arranged vertically as in a table.
Outline: It is similar to the stepped report except that there is outlining and highlighting of the group sections.
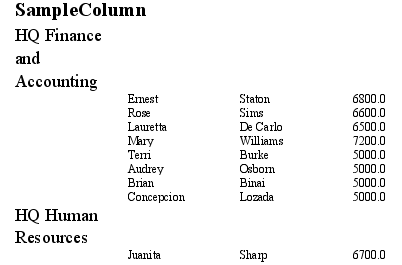
A sample stepped columnar report is shown in Figure 2.6, “Generated Columnar Report”.
You can now improve the report by adding colours, logos and additional information to meet your requirements.
Mailing Labels
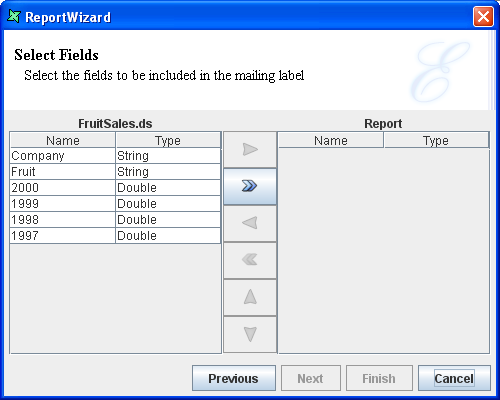
If you want to add a report in the form of a Mailing Labels then select "Mailing Labels" from the list of Report types. Click the Next button. The fields in the data source are listed as shown in Figure 2.7, “Select Fields”. Select the field that has to be included in the report and click on the '>' button. If all the fields have to appear in the report then click the '>>' button. After selecting the fields to be added in the report, click the Next button.
The screen appears with three tabbed panes. They are the
Label, Page and Preview.
Checking on Custom Label will enable the user to customize the
Mailing Label based on individual's needs. If not, the fields in the respective tabs
will not be editable.
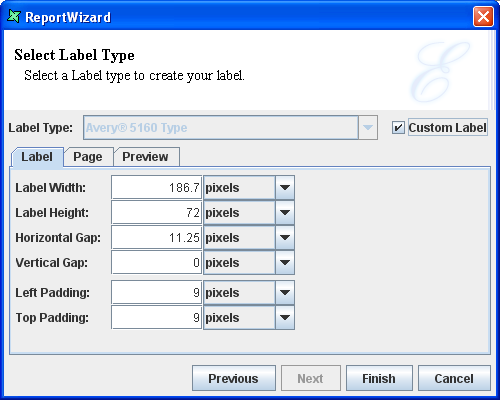
The label settings are displayed in the Label tab
shown in Figure 2.8, “Label Settings”. The available options under Label
tab is given below:
- Label Width: Width of label
- Label Height: Height of label
- Horizontal Gap: Amount of space between each label horizontally
- Vertical Gap: Amount of space between each label vertically
- Left Padding: Amount of space on the left of Mailing Label from the page margin
- Top Padding: Amount of space at the top of Mailing Label from the page margin
Setting the size of the page and page margin are done in the Page tab. If
the list of Paper Size is not enough to satisfy, user can specify their
own dimensions to customize their template.
User can make use of the Preview tab to preview the template before
creating the template. To complete the template creation process, click on the
Finish button.