The Properties DataSource can be used directly or indirectly through a parameter processor. The examples given below illustrates the direct use of Properties DataSource.
The Employee details are maintained in a text file which includes the department field of the employees. Here's how to derive a new column using the department field of the text data source and check the validity of the derived column using the Properties DataSource:
Use the filesystem or folder popup menu to select Add -> DataSource.
The DataSource Wizard appears.
Select Text DataSource and click on the Next button. In the screen that appears enter a unique name for the data source, such as
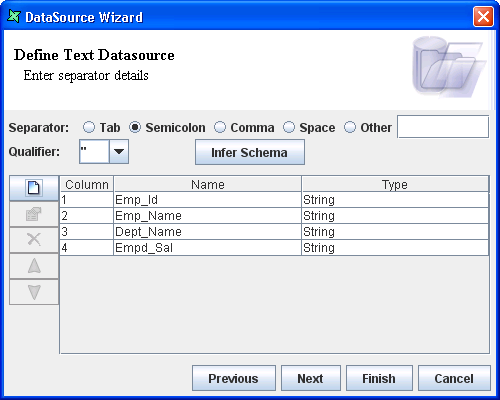
Employee.Enter the URL in the text box or click the button to the right of the text box select the EmpInfo.txt file from the Open dialog window. Select the "First line is header" check box.
Select the Qualifier as " and separator as Semicolon. On clicking the Infer Schema button the columns are inferred. After setting the properties the screen appears as shown in Figure 8.3, “Text DataSource Parameters”.Click the Finish button to add the text data source to the repository.
Select the same location, and use the popup menu to select Add -> DataSource.
The DataSource Wizard appears. Select Properties DataSource and click on the Next button.
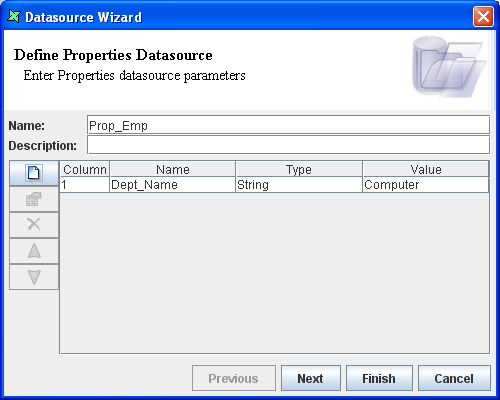
Enter a unique name such as
Prop_Emp.Click the Add Column button to invoke the Add Column dialog window. Enter column name as Dept_Name(same column name as in the text data source), Data type as String and the value as Computer. After entering the values the Add Column dialog window appears.
On clicking the Ok button the column is added to the Wizard. The screen appears as shown in Figure 8.4, “Properties DataSource”.
On clicking the Finish button the Prop_Emp data Source is added to the repository.
Select
Properties Samp, use the popup menu to add a Composite DataSource calledComp1.On selecting and double clicking on the
Comp1.dsdata source the composite designer window opens.Select and place the properties data source Prop_Emp on the diagram. Select the derivative processor from the Action bar of the designer window and place it on the diagram.
Connect the output of
Prop_Empto the input of the Derivative processor.Open the Derivative Properties and select the Derived tab and click on the Add Column button.
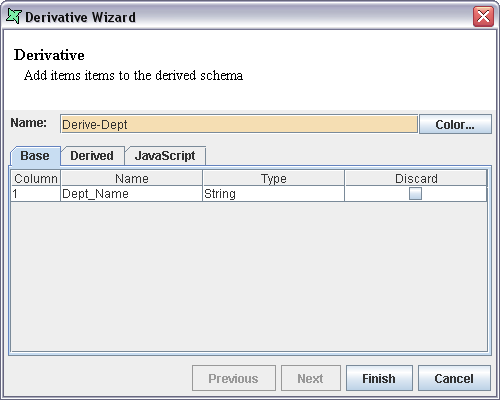
In the Add Column dialog, enter the name as Department, String as the data type and value as "dept". On clicking the Ok button the column is added to the wizard. After entering the properties the processor window appears as shown in Figure 8.5, “Derivative Wizard”.
Select the JavaScript tab and enter the following script in the window.
if (Dept_Name== "Computer") dept = "CPT";
else dept = "Others";
Click the Finish button.
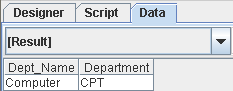
Connect the output of the
Derive-Deptprocessor to the Result. Select Result and choose View from the popup menu. The output will be displayed in the data window as shown in Figure 8.6, “Test Output”. It can be seen that the department Computer is mapped to CPT.Now delete the flow between the Prop_Emp data source and the Derive-Dept processor.
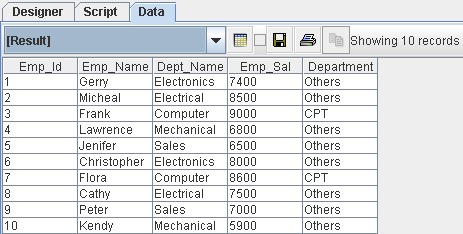
Select and place the Employee.ds data source in the designer window. Using the flow processor connect the output of the Employee.ds data source to the input of the Derive-Dept processor. Select Result, and choose View from the popup menu. The output will be displayed in the data window as shown in Figure 8.7, “Full Output”. It can be seen all the records containing the Computer department are to "CPT" and the Other departments are mapped to others. Thus using the above procedure it becomes easier to check the validity of the derived columns.
Note
Therefore, if you want to test a flow with specific values, you can use a Properties data source to provide them, then switch back to the real data source for release.
Here's how to use a Properties DataSource along with the Parameter processor to pass parameter values for checking a Filter condition:
Add a Properties DataSource named
Prop_Emp1.Add a column called Department with type String and value Electronics.
Add a column called Salary with type Integer and value 7500. The values are shown in Figure 8.8, “Prop_Emp1”.
Click the Finish button to add the data source to the repository.
Add a Composite DataSource called
Comp2.Open the Composite diagram and and drag the Employee.ds onto it. Add a Filter processor to the diagram as well.
Connect the output of the Employee DataSource to the input of the Filter processor.
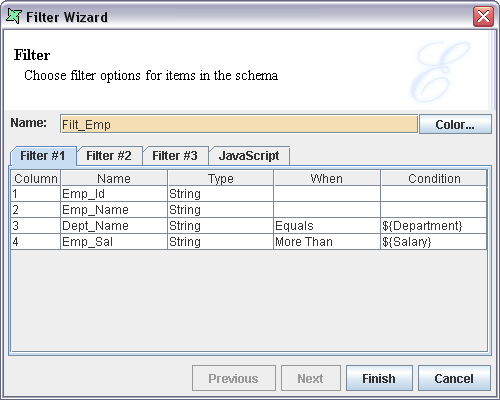
Open the filter properties. In the row corresponding to Dept_Name field select "Equals" option from the combo box of When column. Enter the condition as ${Department}.
In the row corresponding to Emp_Sal field select "More Than" option from the combo box of When column. Enter condition as ${Salary}. After entering the values the page appears as shown in Figure 8.9, “Filter Wizard”. Click the Finish button.
Select the Parameters processor from the action bar and place it in the workspace of the designer window. Change the colour of the processor.
Connect the output of the Filter processor to the input of the Parameters processor
Select and place the Prop_Emp1 data source in the designer window workspace.
Connect the Prop_Emp1 DataSource with the params input of the Parameters processor and the output of the Parameters processor to the Result.
Select Result, and choose View from the popup menu. The output is displayed as shown in Figure 8.10, “Output”.
The values passed by the records of the Prop_Emp1 data source are matched with the dynamic parameters in the filter condition. Based on this the records of the text data source satisfying the filter condition are fetched.


As the flows are pull-push, the data store pulls data from the source, this is when the parameters get added. The pull command propagates back to the filter which uses the properties to control the filter process. The pull command terminates at the datasource, which pushes the data back along the flow, through the filter which has already been configured.