The First Screen of the Object DataSource Wizard appears as shown in Figure 10.1, “Object DataSource Wizard” In this screen the Object DataSource name and schema have to be defined.
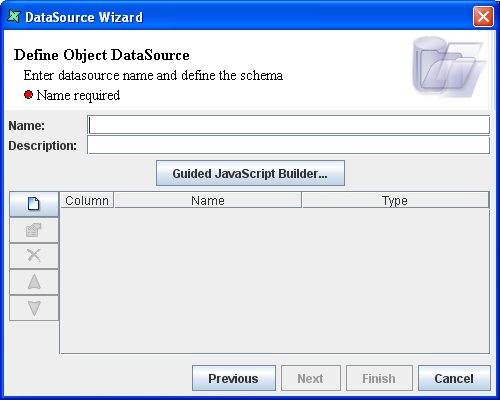
The Name of the data source must be unique. Any extra description that is used to describe the data source can be entered in the Description text box.
On this page you can either infer or edit the data class schema using one of two methods - either enter the schema and JavaScript manually (if you are an experienced Java developer) or use the Guided JavaScript Builder.
With the Guided JavaScript Builder button you are assisted by a wizard that helps you to automatically define the schema and the JavaScript. Of course, you can edit these manually later, so this approach is a useful first step toward customizing the data interface.
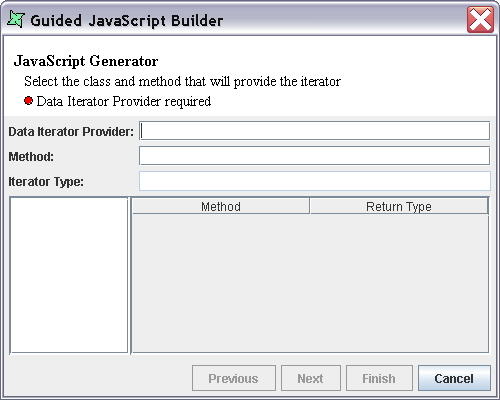
On clicking the Guided JavaScript Builder the screen
appears as shown in Figure 10.2, “Guided JavaScript Builder”. In this screen the details of
the Data provider Iterator class is entered. The tree
view showing the classes available in the ext jars is
displayed on the left side of the screen. Select the Data Iterator provider class.
The Methods and the corresponding Return Type of the class are listed in a table on
the right. On selecting the Iterator method from the list of
available methods the method name and the Iterator type is
displayed in the corresponding text fields.
Click on the Next button. In this screen the data provider class of the Object DataSource is selected. On selecting the Data Class from the tree, the class file name is automatically entered in the Data Class text field.
Finally, on clicking the Finish button the fields names and data type of the selected class are automatically added to the schema definition table
By clicking the Next button, you can see the JavaScript that has been auto-generated.
By clicking the Add Column button you can enter the Data class field name and select the corresponding data type from the combo box in the Add Column dialog window. On clicking the OK button the column will be added to the Schema Definition table. You then proceed onto the next screen Figure 10.3, “JavaScript Editor”. Here you can manually enter the JavaScript code that contains the Iterator method to access the fields in the data source. The Method Browser window lists all the methods and return types from which the methods to be included in the code can be selected and included manually in the JavaScript code.

The JavaScript entered here must conform to the following pattern:
function pushTo(/*PushContext*/ cxt, /*DataListener*/ dl)
{
  // put any imports here

  // call start data to begin rendering the header
  dl.startData(this);

  // get the data to be iterated over
  var dIter = Company.getEmployeesAsIterator();
  while (dIter.hasNext())
  {
    // get the data values to supply
    dataObj = dIter.next();

    // create a record instance to supply the values in
    rec = this.newRecordInstance();

    // get the Object[] to hold the values
    data = rec.getData();

    // fill in the values according to the schema
    data[0] = dataObj.getDateJoined();
    data[1] = dataObj.getDeparment();
    // etc.

    // call process record to begin rendering a detail
    dl.processRecord(rec);
  }

  // call end data to begin rendering the footer
  dl.endData(this);
}
You can use the JavaScript Builder to generate a first-cut and edit it if you prefer. Remember that each time you use the JavaScript Builder it will rewrite the JavaScript, so you will lose any changes you have made. Finally, on clicking the Finish button the Object Data Source will be added to the repository.