Connecting to a relational database can be time-consuming, especially across
a network. The job of a connection pool is to maintain a set of connections
ready for use. You can create a connection pool in the Repository by choosing
Add > Connection Pool... from a folder or filesystem
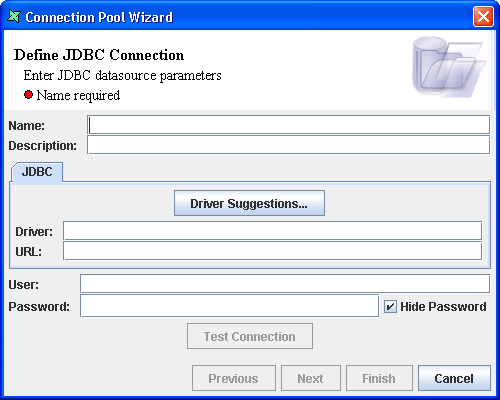
popup menu. A wizard will appear, as shown in Figure 3.10, “Connection Pool Wizard”. The
Test Connection button will only be enabled when the driver is being specified
and will allow the user to test whether the connection to the database is available.
A window will pop-up to indicate if the connection has succeeded or failed.
The information required on the first page is exactly the same as that on the JDBC wizard described above. If you are creating a pool for use on a server, the warning "Driver class not found" means the class isn't found on the local classpath - the JDBC driver may already exist on the server. You can still proceed despite the warning and you will need to verify the server classpath (e.g. the /ext directory of Elixir Repertoire Server) contains the necessary driver for your chosen database.
How to find out the URL: Some JDBC drivers choose to read extra properties from the end of the URL, for example MySQL uses
jdbc:mysql://localhost/Data?useServerPrepStmts=true
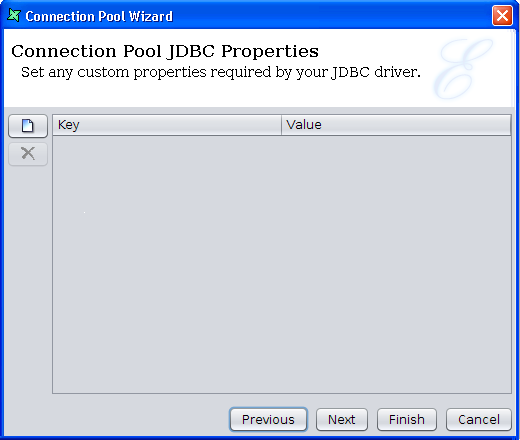
to turn on server-side prepared statements. Other JDBC drivers choose to read a separate collection of extra properties. These extra properties are supported by adding name=value pairs to the table on this page. You will need to refer to the documentation that accompanies your JDBC driver to determine what name=value pairs are supported by the specific driver and database versions that you have chosen.
Note
Dynamic substitutions, such as ${password}, are not available in the Connection Pool because it may be shared by all users of the software and there is no common context from which the dynamic parameters could be obtained.
On the next page, you have the option to set any customized properties specifically for your JDBC driver by setting the keys and values, as shown in Figure 3.11, “Connection Pool JDBC Properties”. For more information on how to work with Connection Pool custom properties, refer to the section called “Configuring JDBC Properties”.
The next page of the Connection Pool Wizard allows the characteristics of the pool to be controlled. The Connection Pool is built upon c3p0
- Max. Idle Time (s)
The time in seconds that a Connection can remain pooled but unused before being discarded. Zero means idle connections never expire.
- Min. Pool Size
The minimum number of Connections the pool will maintain at any given time.
- Max. Pool Size
The maximum number of Connections the pool will maintain at any given time.
- Max. Statements
The size of the pool's global PreparedStatement cache. If Max Statements is zero, statement caching will be enabled, but no global limit will be enforced.
- Max. Connection Age (s)
The time to live, in seconds. A Connection older than Max Connection Age will be destroyed and purged from the pool. This differs from Max Idle Time in that it refers to absolute age. Even a Connection which has not been much idle will be purged from the pool if it exceeds Max Connection Age. Zero means no maximum absolute age is enforced.
- Acquire Increment
Determines how many connections at a time the pool will try to acquire when the existing connections in the pool are all in use.
- Acquire Retry Attempt
Defines how many times the pool will try to acquire a new Connection from the database before giving up. If this value is less than or equal to zero, the pool will keep trying to fetch a Connection indefinitely.
- Acquire Retry Delay (ms)
The time in milliseconds that the pool will wait between acquire attempts.
The final page of the Connection Pool Wizard allows the pool to be secured, by encrypting the file to provide some protection for the JDBC password.
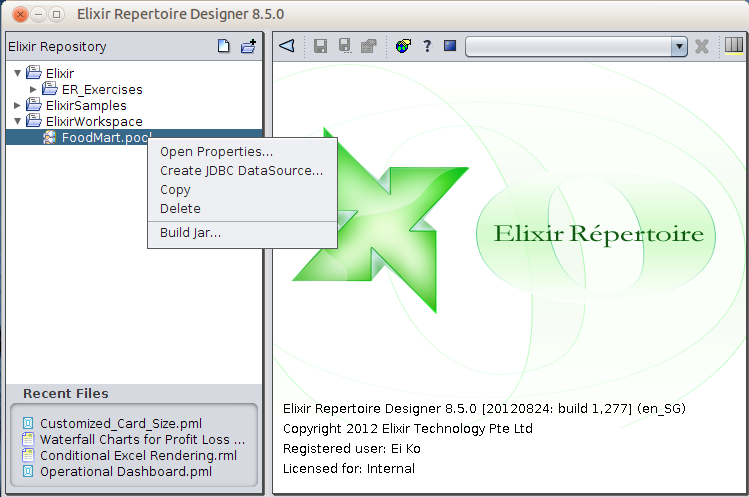
Right-clicking on the .pool file will list a few options, like in
Figure 3.12, “Right-click on Connection Pool”. One of them will be to create a JDBC datasource.
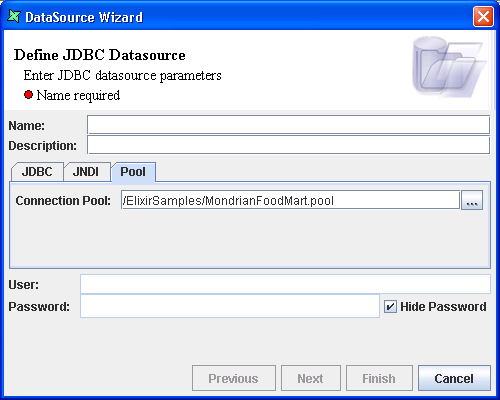
Only the first screen of the wizard will be different as it will be using the
Connection Pool to connect, similar to Figure 3.13, “Datasource Wizard”. The rest of
the pages of the wizard will be the same as creating a JDBC Datasource using the
JDBC tab.


