The details of employees working in a company are maintained in a file. We want to view, count and print out the records.
Note
See Appendix B, Samples for details of the sample files that support the case studies in this manual.
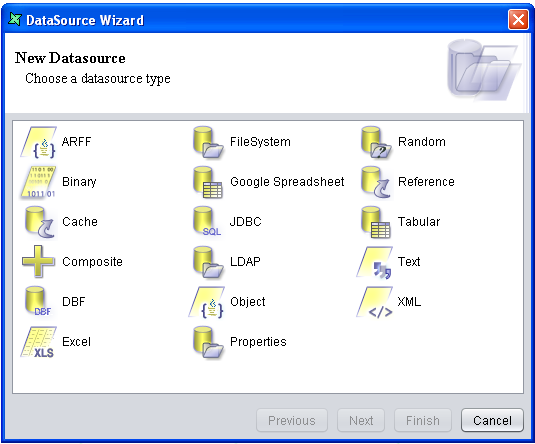
Choose a file system or folder and select Add -> DataSource from the popup menu, the DataSource Wizard appears as shown in Figure 2.3, “New DataSource”. Select the Text DataSource from the DataSource types and click the Next button.
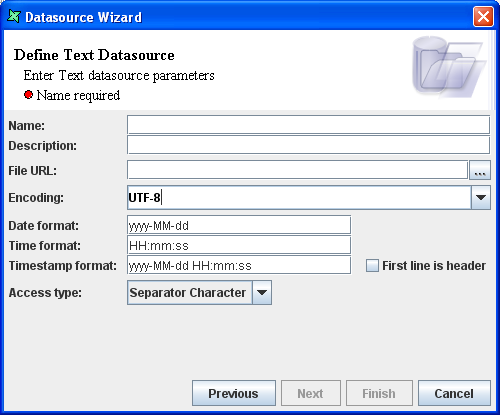
The Define Text DataSource screen appears as shown in Figure 2.4, “Define Text DataSource - Page One”. On this page, enter
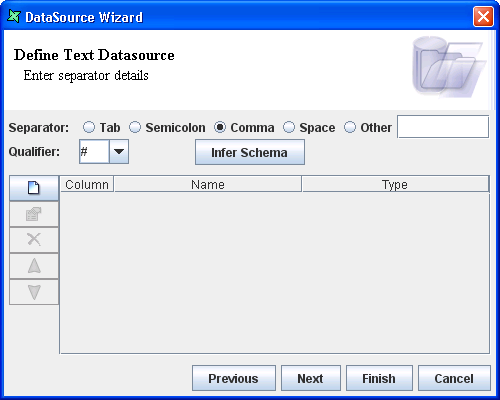
Employeein the Name field. Click the browse button to the right of the File URL text box and select the path to the "Employee.txt" file from the Open File Dialog window. Alternatively, if Employee.txt is in the repository, enter repository: followed by the path to the file. In all of the samples (see Appendix B, Samples) the repository path is used and in this case it is repository:/DataDesignerUserManual/data/Employee.txt. Tick the "First line is header" check box. Click the Next button.The screen as shown in Figure 2.5, “Define Text DataSource - Page Two” appears. In this screen click the Infer Schema button. You should see the field types from the employee text file appear. Click the Finish button. The Employee.ds file appears in the repository under the chosen file system.
Now to load the data of the Employee data source the manager has to click the Load Data icon in the Data window. To print the data, just click the Print Data icon.
Only the first five hundred records are processed in this table. The record count will automatically stop at this limit. If you have a larger number of records, you can select the "Count All Records" check box in the data window before the Load Data icon. Now the total number of records present in the data source is displayed in the toolbar of the Data Window. In this example there are only ten records, so "Count All Records" won't affect the result.
Finally click the close icon on the right of the toolbar to close the view.
Note
Please refer to Appendix B, Samples for the sample files used in this example.


